Pages

Showing posts with label Pinterest. Show all posts

Jan 24, 2014

Scavenger Scrapbooking: Craft or Sewing Room Treasures

Welcome back, Scrappers for Day Five of Scavenger Scrapbooking! Yesterday's challenge was hard for me -- I was stumped with finding something.  If you found treasure from the workroom, don't forget to link up your project HERE.

There is an example I can show you of a layout completed a while ago with a found item: old luggage keys. (Remember the days when we could lock our luggage with these little things??)


 Today's search is in . . . . The Craft Room!

Yes, this may seem to be too obvious a place to look for hidden treasure, but let's take a relook, shall we?  While this may seem to be an obvious choice, we may have passed over some great goodies that can be additions to our scrapbooking stash. Ready for this challenge??

Don't forget to look through your crafts and sewing boxes for:
  • sewing machine or old sewing patterns
  • patches, fabric remnants
  • embroidery thread
  • feathers, fringe
  • felt, yarn
  • lace, elastic, rick rack, seam bias, zippers
  • leather pieces
  • foam craft pieces
  • measuring tapes, pins
  • gift bags and tags
  • silk flowers
  • beads
And if you are sure you won't find anything in your own craft room, maybe you can get permission to rummage through a family member's sewing or craft box. Not too long ago, my mom got rid of an old sewing machine table that she had around forever.  I had no place for it (I wish that I had!) but what I really wanted was to get inside those drawers before she threw everything out.  The button drawer was the grand prize; I was able to get a mason jar full of beloved buttons to use for scrapbooking and all sorts of projects!  

Or if you have the budget for it, allow yourself so much to spend at a local Thrift Shop or Goodwill Store. Look for some of the items above that you could find yourself tearing apart and using.  

Make sure you share what you find!

Lastly, if you would rather have a color challenge today, here is something fun:  Go get a favorite pillow in your home and put it by your scrap area.  Use the color and/or pattern from it as the inspiration for today's project!  

Use your item and/or inspiration to make a scrapbook or craft project.  Link up any of your projects for this series to THIS MAIN PAGE at any time so that future readers can become inspired by your project!  


Jan 23, 2014

Scavenger Scrapbooking: Workroom Wonders


Welcome to Day Four of Scavenger Scrapbooking!  Did you complete a search of the bedroom, bathroom or beyond from yesterday?  Was it like going to "infinity and beyond?"

I have to say, I didn't think I would have much luck in my own hunt yesterday, but I did come across a couple things that didn't get thrown out in my "cleansing" right after Christmas.


Yes, that is a ponytail holder that was stretched out and unusable, plus an earring with a long, lost mate.  So what do you come up with for this?


The filigree on the hair band reminded me of this Cricut embossing folder I haven't used in eons, and the earring was the inspirations for the colors.  I will probably still use the earring beads for another card. 

Don't forget to link any of your projects for this week HERE.  

Ready for the next challenge?  Today it is the WORKROOM.  

This could be quite an opportunity for some unique finds!

If this area is considered the "Man Cave" of your home and it is an area you would rather not attempt, I understand! (We have certain "man rules" at our house too!)  Try another room such as the Mud Room, Hall Closet, inside the family vehicles, or the area of your home that is considered the "Drop Spot."

Here are some items that may spark your creativity from the workroom, garage or other area:
  • wire
  • old keys
  • picture hangers
  • paint chips, flooring or laminate samples
  • garden seed packets
  • washers, bolts, grommets
  • hinges or other small metal accents
  • nails and screws*
  • paint sticks
  • sand paper
  • cardboard
  • old measuring tape or wooden ruler
  • fast food wrappers, recycling
*Use a Dremel tool to cut off the top of nails or screws in order to use them on your page.

If this becomes difficult, try this:  While looking at this area of your home may not necessarily give you inspiration, you could find a texture for a project technique, a color from the family car or your gardening items, or the set-up of a work table for a sketch idea.  Oh yes -- we can really thinking outside the box. Or the garage, per se.

Use your item and/or inspiration to make a scrapbook or craft project.  Link up any of your projects for this series to THIS MAIN PAGE at any time so that future readers can become inspired by your project!  

Jan 22, 2014

Scavenger Scrapbooking: Bed, Bath and Beyond

Welcome to Day Three, Scavenger Scrapbooker!  Did you complete the hunt of the kitchen yesterday?  Did you remember to link up your project HERE?

After looking through my own kitchen, I discovered this stash that probably won't be used in it's original state anytime in the near future:


Yes, I have become one of those Coffee Addicts.  Tea is lovely, but I am usually finding something to wake me up more than to relax me!  After this find, I put together this quick pocket card:


This is an origami folded pocket card started from an 8" x 8" size sheet of paper. It is simply decorated with flowers, ribbon and a "digital sentiment."  (I created my own because I wanted a specific sentiment that I didn't have a stamp for)  Something great to give the Bestie for Valentine's Day.

Here is another idea using a coffee cup warmer:

This was an over sized Thank You card I made for my son's teacher last Spring, as a fun way to give her a Starbucks gift card.

Today's challenge: the Bedroom, Bathroom and Beyond
The "Beyond" can be another room in your house such as the laundry room.  I know that you're thinking that this search could be tricky, but you'll be surprised at what you can find!  As you start your hunt today, here are some items that may trigger creativity:
  • safety pins, Band-aids
  • emery boards, nail polish
  • shoelaces, cording from old sweat jackets
  • clothing tags or price tags from new clothing
  • old or broken jewelry pieces (beads, bling, hooks)
  • playing cards or miscellaneous game pieces, puzzle pieces, Legos
  • items from clothing to be discarded:  buttons, beads, tags, pockets, lace
  • greeting cards, old magazines or puzzle books
  • box from a favorite cologne or cosmetics
  • ribbon or twine from a cosmetic bag or pouch
  • dryer sheets, cotton balls
  • candy wrappers (come'on -- I know you have a stash like I do!)
Remember to hunt in your kids' rooms too!  THAT can be an interesting thing all in itself, right?

Would you rather have a Color Challenge?  Look at one of these rooms and find a color that could be the inspiration for today's project.

Use your item and/or inspiration to make a scrapbook or craft project.  Link up any of your projects for this series to THIS MAIN PAGE at any time so that future readers can become inspired by your project!  

Jan 21, 2014

Scavenger Scrapbooking: Kitchen Catch-all

Welcome to Day Two of Scavenger Scrapbooking!  Did you complete the hunt in the Home Office from my previous post?  Did you remember to link up your project HERE?

After taking a  look at our home office, this is what I found yesterday:

I totally forgot about this hole punch -- it has a hole that is bigger than the ones on my Crop-a-dile and a better size for standard tags.  Score!

From these random paperclips, I found some scraps of ribbon and looped them through the top to make my own embellishments.  Here is one:


Easy to make and much cheaper than buying them premade.  From the Proverbs magnet, I made a card, using the colors as inspiration:


This card doesn't have a sentiment, so I may just enclose the magnet when I send the card!  The other scripture card in my finds was also used as color inspiration:


For this layout, I used a birthday photo and then followed Crystal Schneider's sketch that is now live at The Memory Nest blog for the Monday Challenge!  This sketch was just perfect for scrapping this photo while using some My Mind's Eye "So Sophie" Royal paper. I added a little of the light aqua in order to break up the dark colors with a nice splash of fun.  

Did you find several items in your search but don't have time to make projects with all your treasures?  That's okay! Use a basket to keep your goodies together -- it will serve as inspiration for days to come!  (And of course, you may certainly end up using several of the items on one project!)

Don't forget to link up your project(s)!  I cannot WAIT to see what you've put together!!  

Now on for today's challenge:  The Kitchen.
Let's take a fresh look and see what we can find that will become a new element on our next page.  This room can be a catch-all for so many "intriguing" things, right?  Here are some more ideas to get your hunt started today:
  • coffee filters, cupcake liners, doilies
  • tea bag envelopes, canned food labels
  • straws, wine corks, bottle caps
  • junk mail, store receipts
  • take-out menus
  • old cookbooks or recipe cards
  • cookie cutters
  • paper lunch sacks
  • mesh produce bags
  • paper coffee cut holders
  • aluminum foil
  • string, bread bag tags
  • popsicles, chopsticks, toothpicks
Don't forget to check the front of your refrigerator for artwork, notes, reminders and of course, photos.

Would you rather try a different challenge?  Look at your kitchen and/or dining room as a whole.  Is there an item or color that can be your inspiration for today's project?

Use your item and/or inspiration to make a scrapbook or craft project.  Link up any of your projects for this series to THIS MAIN PAGE at any time so that future readers can become inspired by your project!  

Jan 20, 2014

Scavenger Scrapbooking Series: Home Office

Welcome to Day One of this fun series!  We are going on a daily Scavenger Hunt of our homes this week in order to find items of inspiration for a new scrapbook project.

For the next five days, I will give you a challenge for finding something to use differently. For instance, could you use the found item as a:
  1. Unique embellishment or ephemera? 
  2. Overlooked tool? 
  3. Something to turn into a trendy embellishment?
  4. Color inspiration for a new project?
  5. Subject of it's own scrapbook page?
Today's challenge: Home Office Review
Sometimes we forget about the handy items we could use from this room. As you start your scavenger hunt, open up your mind as you look for something that could have a new use.  Here are some items to get you started:
  • printer labels
  • old mail envelopes (look for cancelled stamps)
  • binder clips and paper clips
  • file folders and file tabs
  • CDs (new or old)
  • stationery with matching envelopes
  • key fobs or rings
  • receipt books, rolodex or index cards
  • coin, CD or other specialty envelopes
  • old books, dictionary, thesaurus
  • brads, rubber bands
  • hole punch, date stamps
  • Post-It notes or similar
  • packing tags, ticket rolls
  • punched hole reinforcements
Grab an item that makes you go "Aha!"

Finally, look at the entire room.  Is there an object or color that could trigger some creativity?  

Use your item and/or inspiration to make a scrapbook or craft project.  Link up any of your projects for this series to THIS MAIN PAGE at any time so that future readers can become inspired by your project!  

Apr 20, 2013

Pin-Made Creations: Card Share!


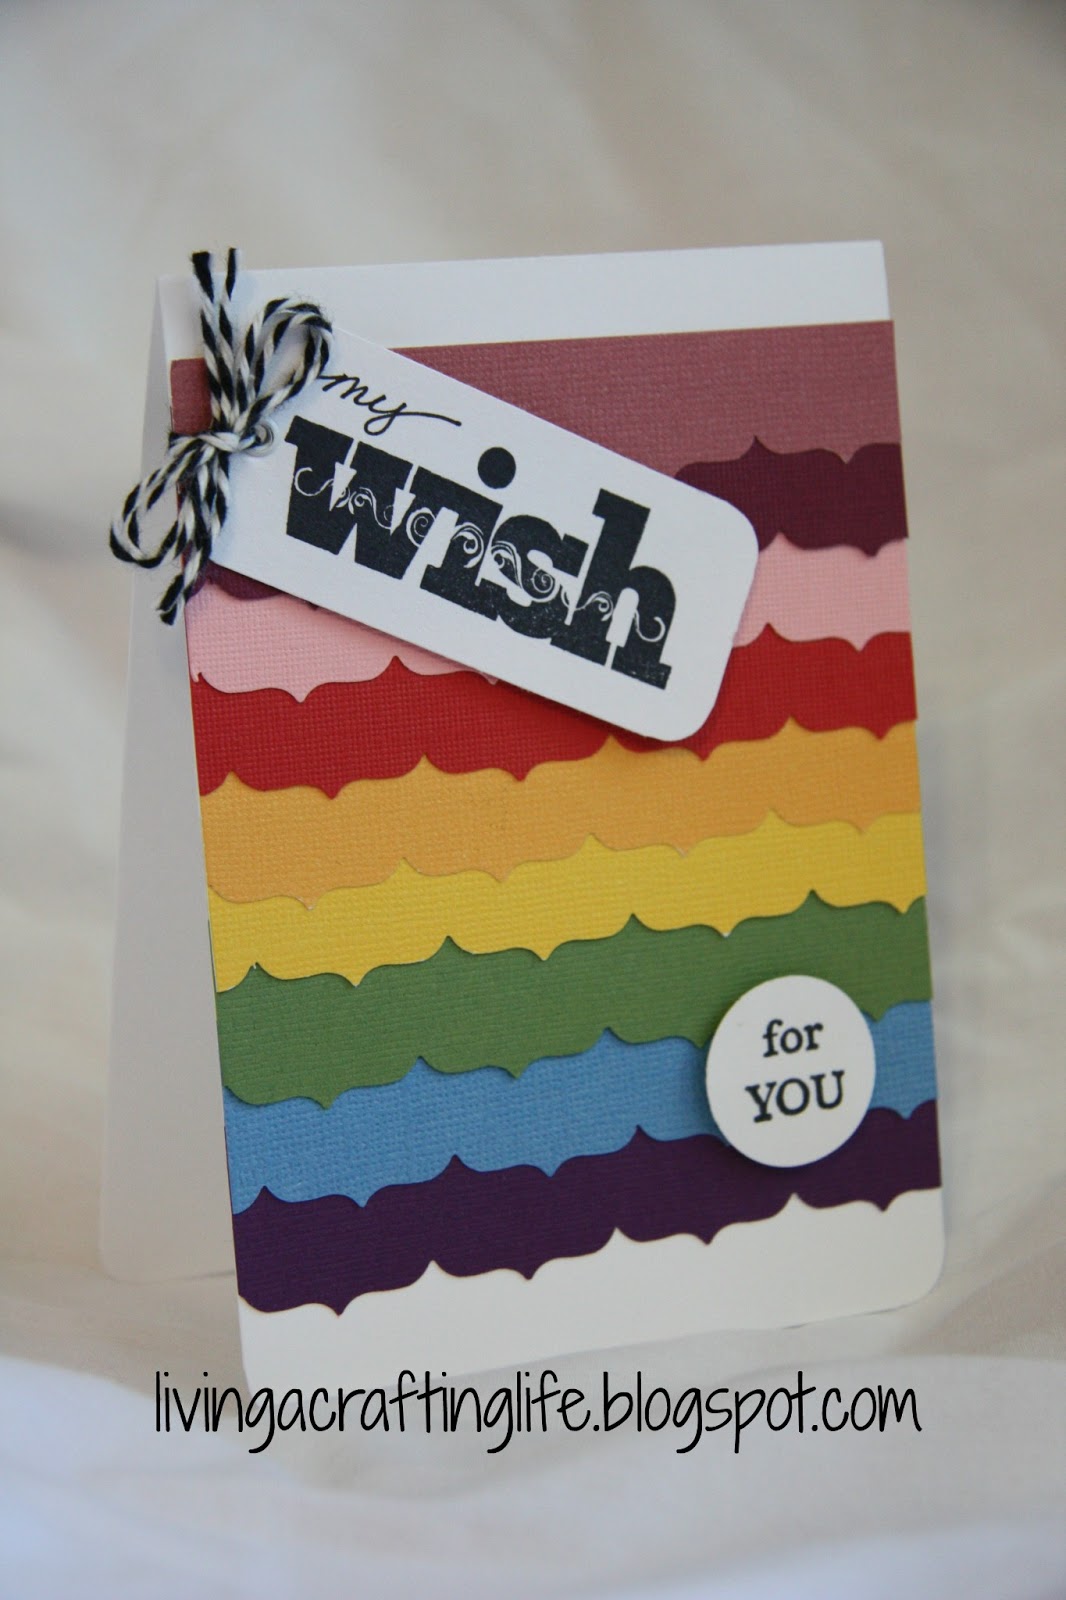
Pinterest is great, but if you are just "pinning" crafts and not "doing" them, you are really missing out!  This weekend I completed four cards where the inspiration came from pins.  Below are photos of my cards, with links to the pins.  Please check out the original cards too!  Their work is awesome (which, of course, is why I pinned it!)

Card #1:

This card has lots of purple, but the white embossed background on the original card just didn't look quite right on my card, so I went with this one, with a lighter bow.  The Bluebonnet stamp is from Texana Designs.

Card #2:

So simple and classic -- and I needed a baby card for next week!

Card #3:

The original card had a lovely blue with the yellow, and this is the only paper I could find to simulate it.
Not sure if I like it or not.  Please look at the original and let me know what you think I should change!

Card #4:

This is probably my favorite of the four; loved how it turned out,
and the original was so darn cute, I had to give this one a try.  

Have you remade a card from Pinterest yet?  If so, link up in the comments below so we can see!

Nov 17, 2012

Scrapbook Process: Gratitude Journal

After posting several recipes, I thought it should be time for a paper crafting project!  This weekend I am finishing up a Gratitude Journal that was devised from combining two different online ideas. This will be my own personal gratitude journal; I have been working on it for a couple weeks.


 The idea of using a type of tag book was from this Scrapbook Showgram by Sandy Genovese.  (FYI - watch now if interested in this tutorial; her episodes are only accessible for a short time unless you are a Gold member)  In this episode, Sandy demonstrates how to create a Thanksgiving Tag Book by making your own oversized tags with a simple template and a cute box/cover in which to store it.  For my tag book, I included more pages so that I had one for each day of November.  I haven't decided if I will make the box for it or not.


Instead of filling my tag book with just journaling, I found this great 30 Day Photo Gratitude Challenge on Pinterest.  This idea is originally from PositivelyPresent.com and is a complilation of 30 items, one assigned daily to photograph.  I didn't follow this list exactly, but it was a fantastic starting point for me to take photos of things of which I am grateful and may not have made the effort to photograph otherwise. From my second photo of the tag book, you can see that I embellished the inside cover, but kept the pages simple and uncluttered, ready to put a cropped photo and journaling on each page. There are 15 pages; once you go through the first 15 days, you flip the book for the second 15 days. The paper was from a "grab bag special" from Close to My Heart a couple years ago and it was the perfect subtle fall theme for this book.  Printing photos and journaling is on tap for this weekend!

I hope this gives you an idea of how to make a simple Gratitude journal for yourself, or to make one for each family member or guest to write in their gratitude on this Thanksgiving Day!

Nov 16, 2012

Pin Made Creations: Tasty Cereal Bars: Easy to Make!

Have you ever purchased a box of cereal and see a recipe on the side that may sound good, but you never get around to making it before the box is thrown away?  That's me too.  However, this week I actually made a recipe that was on the side of my youngest son's favorite cereal, Chocolate Cheerios.  It's like making Rice Krispie treats, but with probably one extra step.  And a couple more ingredients.


When my oldest son Matt likes something, then I am doing pretty good.  Getting a hug for making these tasty cereal bars was a bonus!

Chocolate Peanut Butter Cereal Bars
(courtesy of General Mills)

Prep time:  15 minutes
Total time:  30 minutes
Makes 24 bars

5 cups Chocolate Cheerios cereal
3/4 cup raisins
3/4 cup salted peanuts
1 cup corn syrup
1/2 cup packed brown sugar
1/2 cup granulated sugar
1 cup creamy peanut butter
1/2 cup milk chocolate chips

Spray 13x9 inch pan with cooking spray.  In large bowl, combine cereal, raisins, and peanuts; set aside.  In 2-quart saucepan, place corn syrup and sugars.  Heat to boiling over medium heat, stirring constantly; remove from heat.  Stir in peanut butter.  Pour peanut butter mixture over cereal mixture; mix until thoroughly coated.  Spread evenly in pan.  In small microwavable bowl, microwave chocolate chips on High 1 minute, stirring every 15 seconds, until melted and smooth.  Drizzle over bars.  Refrigerate 15 minutes or until chocolate is set.  (To drizzle chocolate: place melted chocolate chips in resealable plastic bag.  Cut off small piece of corner; drizzle chocolate over bars.)

NOTE:  At first, I was not going to add the raisins; I thought it an odd addition. Since I hadn't made these before, I went according to the recipe, and the raisins do add another subtle flavor to the bars.  The kids didn't even notice the raisins were there.  I would suggest using the bag tip for drizzling the chocolate; I decided to just drizzle with a spoon, but ended up with big blops of chocolate and had to use a knife to spread the chocolate evenly over the bars. Finally, I cut the rest of the bars in thin rectangles instead of squares, thinking that when unwrapping, it would be easier to eat.

Be sure to try these and add them to your kid's lunches or give them for their school snack.  This recipe is the equivalent of buying four boxes of the other General Mills cereal snacks, which could run about $12. All the ingredients of this recipe were in my cupboard, with the exception of buying a new box of cereal and the bag of chocolate chips, so for me it was a cost of $5.

Nov 12, 2012

Pin Made Creations: A Flavorful Weekend

It felt a little more like fall this weekend -- even though the temps were still a little warm here in Texas, it must have been the time change that brought about my flurry of wanting to make warm foods.

The first comfort food on the list was Chicken Tortilla Soup.  This is actually the first time I have ever made this soup!  Certain foods I am always nervous to try, because when it comes to flavorful Mexican cuisine, my hubs is extremely picky. This recipe was found in my stash, and it looked so easy I figured I would give it a try.  Believe it or not -- it was easy and a real success!  The hubs found it delicious.  If he found it tasty, then I knew it was safe to share.

NOTE:  The recipe is actually called "Chicken Tortilla Stew" and I realized that after simmering, since the "soup" was very thick.  Since I wanted more of a soup than a stew, I just added one more can of chicken broth than is listed here in the recipe.  I also couldn't find the required 10 oz. cans of the enchilada sauce, so the two 15 oz cans that I did buy worked fine.  Just more flavor.  Of course, you can use different temps of enchilada sauce, depending on the taste buds in your house.  Oh, and I also used the suggested rotisserie chicken, and that was superb tasting and easier to do.

This recipe makes enough for about two 4-5 serving meals.  Well worth it.

Chicken Tortilla "Stew" 

4-5 cooked, boneless, skinless chicken breast halves, or 1 rotisserie chicken, shredded (about 6 cups)
3 cans (14 oz. each) reduced-sodium chicken broth (add one more if you want a thinner consistency)
2 cans (10-15 oz each) mild red or green chili enchilada sauce
1 can evaporated milk
2 cups matchstick or shredded carrots
I cup uncooked long or medium grain rice
1 to 1-1/2 teaspoons ground cumin (depending on your taste)
2 cups frozen whole-kernel corn, thawed
1-1/2 cups broken tortilla chips
Fresh cilantro leaves, sliced green onions (optional)

Combine:  broth, enchilada sauce, evaporated milk, carrots, rice and cumin in large pot.  Cook over medium-high heat until mixture begins to simmer.  Reduce heat to medium-low.  Simmer for 15-20 minutes, stirring occasionally, until rice is tender.  Add chicken and corn; stir well.  Salt and pepper to taste.  Spoon into serving bowls; top with tortilla chips, cilantro and green onions, if desired.  (Shredded cheese is a good option too)

Second on the list was a rerun of another successful recipe of Banana Nut Bread that I found on Pinterest.  Oh. My.Word.  This is absolutely the BEST Banana Nut Bread I have ever made (and I have made a lot of different recipes!)  It is so moist and so flavorful --it is just divine.  My all time favorite treat with coffee in the morning.  The first time I made this, the loaf was gone in one day.  This weekend I made one loaf and a tray of mini loaves, and it's all gone after two days.  It's that good!

So a thankful shout out to Janet -- the original poster of this recipe on BookCooking.net.  You have made my family very, very happy.

Janet's Rich Banana Bread

1/2 cup butter, melted
1 cup white sugar
2 eggs
1 teaspoon vanilla extract
1-1/2 cups all-purpose flour
1 teaspoon baking soda
1/2 teaspoon salt
1/2 cup sour cream
1/2 cup chopped walnuts
2 medium bananas, sliced

Preheat oven to 350 degrees F.  Grease a 9x5" loaf pan.  In a large bowl, stir together the melted butter and sugar.  Add the eggs and vanilla, mix well.  Combine the flour, baking soda and salt, stir into the butter mixture until smooth.  Finally, fold in the sour cream, walnuts and banana.  Spread evenly into the prepared pan.  Bake at 350 degrees F for 60 minutes, or until toothpick inserted into the center of the loaf comes out clean.

NOTE:   A stick of baking margarine was used instead of butter, and my vanilla was imitation, but it did not alter the delicious result.  My choice is to use very ripe bananas, which I think helps with the moistness of this recipe. For my second batch, the bananas here at home were not very "over ripe", so I sliced two bananas into a microwavable bowl and cooked it on high for 30 seconds to get them a little softer.  After cooling, I added to the recipe.  When baking the mini loaves, I checked them after 30 minutes and they were done perfectly.

Hopefully you will have a chance to try one of these recipes!  Enjoy!

Oct 6, 2012

Pin Made Creations: Precious and Few

Hi again!  Another card is finished ... this one I scraplifted from Sandy at the Paper Crafts Magazine blog that was posted today.  Click HERE to see Sandy's card that was my inspiration.  Her card is also repinned  to my board, Cards I Must Make on Pinterest.

Pretty yellow pattern paper, like Sandy used, never seem to be something that I have on hand, so I decided to try another color.


I also didn't have any pretty black ribbon, so I found some fun fibers to come up with something similar.  

What cards are you scrapping today?


Pin Made Creations: World Card Making Day!

Happy World Card Making Day!  I am dedicating "me time" this weekend to make cards with the rest of the paper craft world!  I started last night (woohoo!) and to get the mojo going, I thought I would try Pin-making a couple cards I repinned on my "Cards I Must Make" board on Pinterest.

Here is my first card.  Below the card is the original post with the original card:


See original card here: Sarah's Just Visiting

I loved the border on Sarah's card and since I couldn't replicate it exactly, I put my own spin on it and then flipped the sketch.  

The second card got me going on my Cuttlebug, which I need to use more often.  This was a vertical card, which I should do more often too! 


See original card here:  Simple and Sincere

Jen is a Stampin' Up rep and she has many gorgeous stamped cards on her website, in addition to many card sketches!  My card doesn't do justice to hers, but I loved the sketch.  I want to add a ribbon on it, but am refraining because simple is good.  

Finally, the last one I did last night:


See original card here:  Splitcoast Stampers - Wendy


I think this is my favorite of the three. This card took me the longest to finish; I was determined to use paper scraps and it took some time to find scraps and coordinating inks in my stash.

More to come -- I'm on a roll and I desperately need a variety of cards for my stash.  A good reason to celebrate all weekend, right?

There are so many beautiful cards and ideas on Pinterest!  Remember to be courteous: if you Pin-make anything you see on Pinterest, give credit to the original poster/blogger.  Notice I didn't put my watermark on these photos, because even though I put my own spin on them, they aren't necessarily my original work.

Sep 29, 2012

Pin Made Creations: Blonde Brownie Goodness

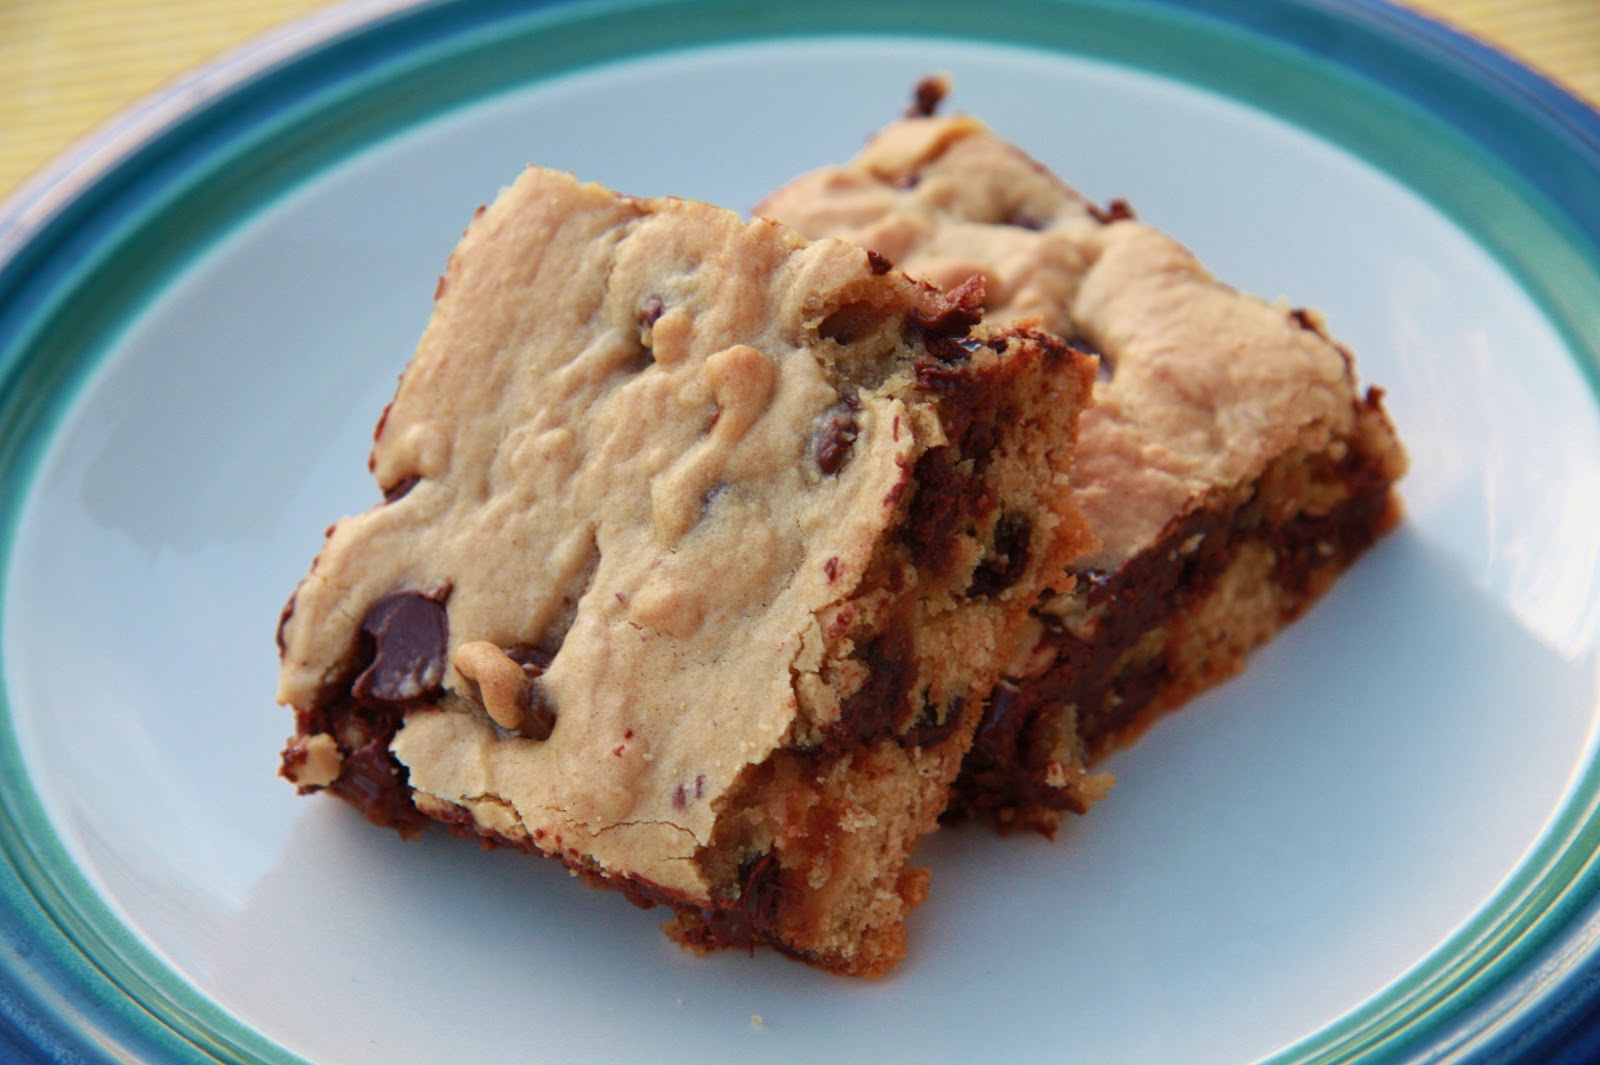
We've had a sweet tooth lately at Casa Vallejo.  This time I made a batch of Blonde Brownies with chocolate chips for the Hubby, who is so good to me and loves a warm chocolate chip cookie!  These brownies turned out nice and gooey since I used a whole bag of chips.

This recipe I have had since the dark ages; I was in my early 20s when a group of single gals at work were collecting and trading recipes. We wanted to be ready  for the day when we would get married and cook everything we would put in our mouths by scratch.  While cooking by scratch didn't quite happen when I was that young, I did get some great go-to dessert recipes like this one.  Thanks goes to Vicki Milsap --  it'still a hit and it's going on Pinterest!

Blonde Brownies

2 cup brown sugar
2/3 cup melted margarine
dash salt
1 tsp vanilla
3 eggs
2-3/4 cup all purpose flour
2-1/2 tsp baking powder
chocolate chips  (I used a 12 oz bag)

Melt margarine and cream it with the brown sugar.  Add salt, vanilla and eggs and mix.  Add flour and baking powder and mix.  Add chocolate chips.  Bake brownies in a 9 x 13 pan (sprayed with nonstick cooking spray) at 350 degrees for 25-30 minutes but no longer.

Sep 26, 2012

Pin Made Creations: Microwave Apple Crunch

Last evening, everyone was craving something sweet. Well, my teenager had the craving, and I am always game for sweets!

Time to create my own Pin for Pinterest!  Based on what I had on hand in my pantry, I devised this quickie recipe for Microwave Apple Crunch that was a hit with the teenager and everyone else.  It resulted in delicious soft apples and raisins in a creamy carmel-like sauce.  Adding a little whipped cream didn't hurt either!  Perfect for the beginning of autumn.  Delish!


"Casa Vallejo" Microwave Apple Crunch

6 apples (I used 3 Granny Smith and 3 Red Delicious apples I had on hand)
1 Tbl lemon juice
1/3 cup sugar
2 pads of butter or margarine
1 Tbl all purpose flour
1 tsp cinnamon (I used a little more 'cause I love it!)
1/2 tsp nutmeg (or less or none, depending on your taste)
dash of salt
small handful of raisins
granola of choice.

Peel, core and slice apples.  Put in a microwaveable bowl and sprinkle the lemon juice on the apples; mix well.  Add the rest of the ingredients except the granola.  Mix well.  Microwave on high for 3 minutes.  Mix well again.  Microwave another minute to 1-1/2 minutes, depending on how soft you want the apples.

Serve immediately into bowls, add your favorite granola (I used a Cascadian Farms brand that had almonds)  and some whipped cream or vanilla ice cream if you wish!  Serves 4-6.

Enjoy!

Sep 25, 2012

Pin Made Creations: Mini Frittatas from Pinterest

Let's assume that ANYTHING made from Pinterest is crafty.  Including food.

I made my first Pinterest-inspired recipe this past week and it was a big hit with my family.  That is an accomplishment, especially when it comes to food and four different preferences and tastes.

Here is the original pin which I have on my Pinterest Food board:

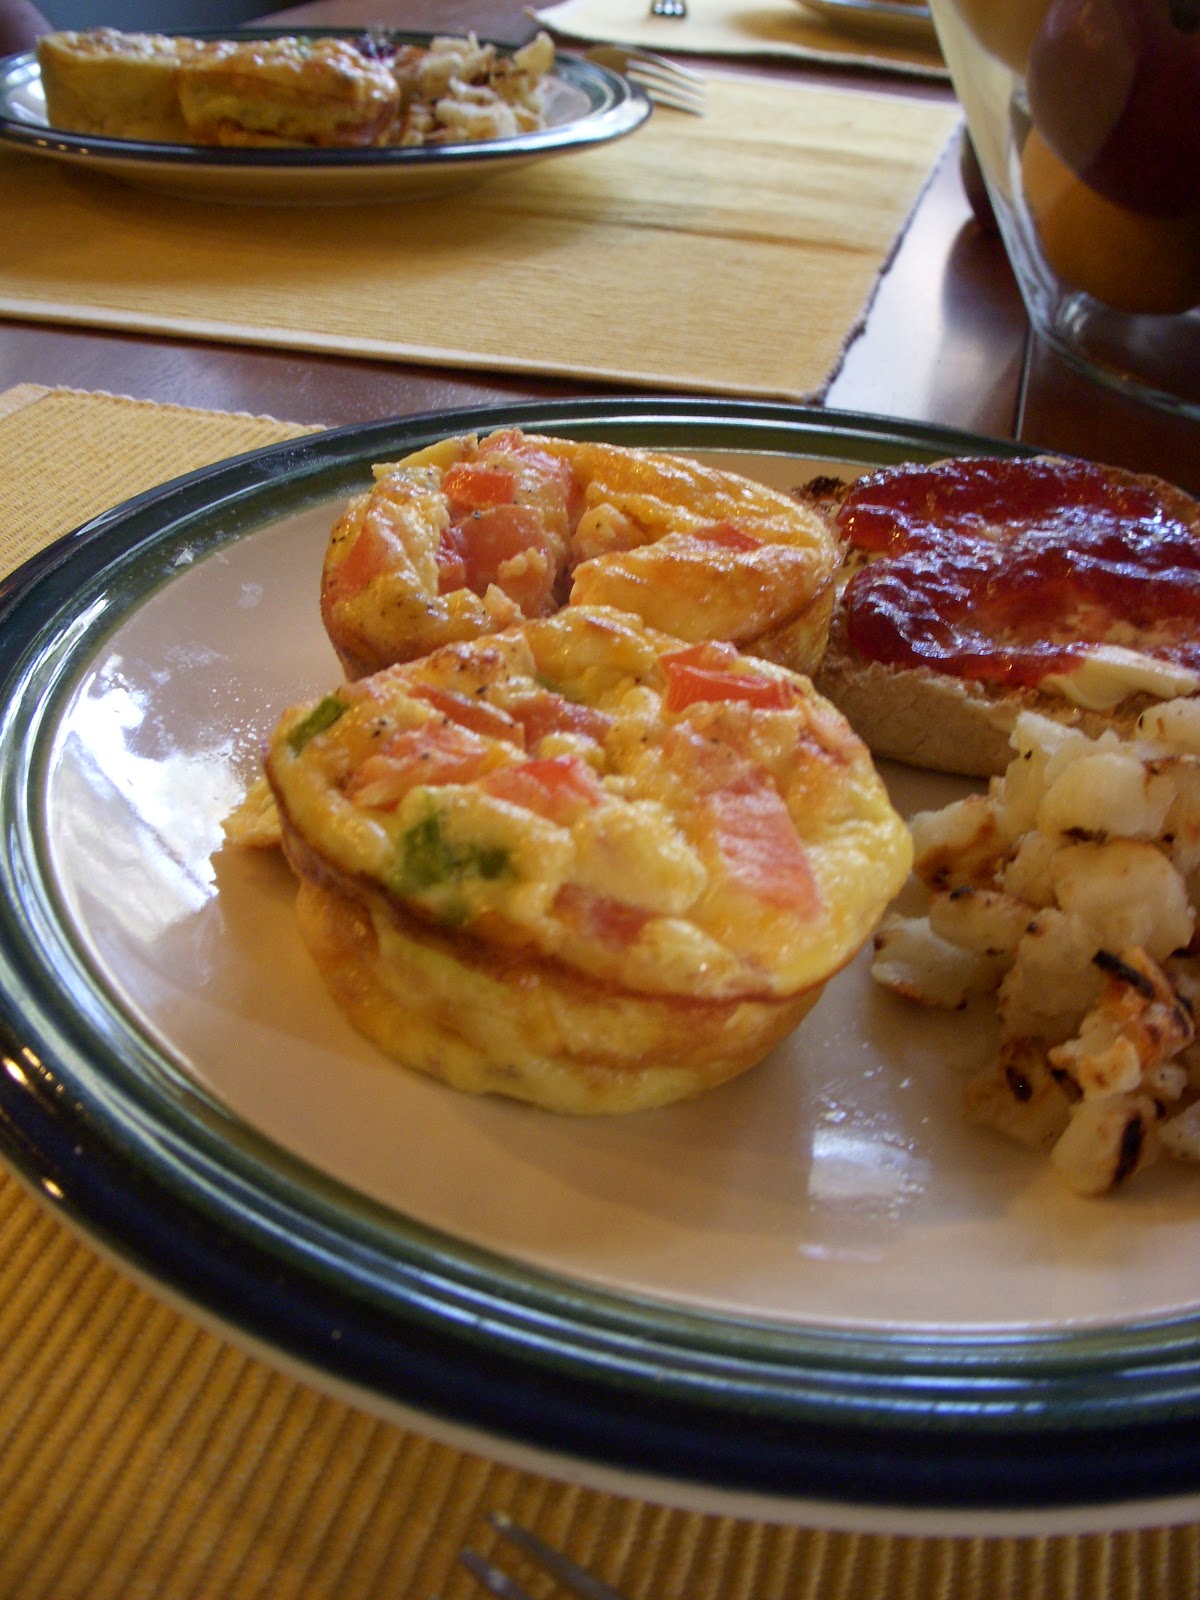
Here is my finished product:


Sorry, my photos are not the best and I didn't take time to make the food pretty and photo worthy -- I was just so excited that the frittatas turned out this nice!  We enjoyed these scrumptuous mini frittatas for supper with hashbrowns and English muffin toast with homemade jam.  Delish. 


Besides the hubs, I have a 15 and 9 year old, both growing boys, and both of whom love to eat a lot if I make something that they like.  The key is making something for the evening meal that everyone likes.  And it must have meat.

I made these frittatas in the large muffin size pans, not a regular muffin pan (that holds 12) as the blogger probably used.  I doubled the amount of eggs and milk to fill my two pans. Everyone made their own frittata from provided ingredients, including precooked Jimmy Dean Turkey Sausage Crumbles, Oscar Meyer Real Bacon Recipe Pieces, green pepper, tomato and shredded cheddar cheese. Once they chose their ingredients and put them in the pan, I added the egg mixture until each well was two-thirds full.  Good thing I used two pans -- these were quick to be eaten!

From the teenager when I finally asked, "How do you like them?" he replied, "I'm not. I am thoroughly enjoying them."  From my 9 year old I just got a smile and a nod, since his mouth was very, very full.  The  Hubs really liked them too -- and he is the one that I always want to impress.  Score for the Wife on this one!

To follow me on Pinterest, click on the Pinterest button on the right side of my webpage.  More "Pin-Made" to come!