Pages

Showing posts with label boys. Show all posts

Jan 16, 2014

Scrapbook Process: RSVP by Basic Grey!

If you find yourself behind in your Birthday layouts or cards, Basic Grey has once again made a versatile kit that is perfect for both. It's the RSVP paper line, and this week I am highlighting this lovely kit, courtesy of  Leslie at The Memory Nest Store and the Blog.

 
Papers included, Side A

Love these B sides!

Here is how I started my layout:  The left of this next photo shows previous 8-1/2 x 11" pages that I wanted to redo in 12 x 12 size, along with the reprints of the focal photos that I want to use this time around.  

I chose this combination of paper for the page:


Oh, and check out January's Pagemaps at pagemaps.com; their sketches this month are SO fitting for this paper kit!  This is the one that I selected:


Here is the start of the layout process incorporating three photos instead of just the one as shown on the original sketch:    


Normally I don't utilize stamps for layouts, however, I had a Hero Arts stamp set with a cupcake motif that was perfect for this particular page! It was time to practice with my Bic Mark-Its (plus a Copic blender pen). I am not a alcohol marker pro whatsoever, so in this case I stamped the image three times so that I could practice color combinations and choose the one that worked best. 


The complete layout:  This page also includes items from the RSVP Mixed Brads, available separately from the paper kit (but a must-have!):


Here are some closeups of the embellishment areas. Aren't the pinwheels cute? Oh, and notice what I did with the title - I was out of "E's" so I substituted with "3's" turned backward.  It fits the whimsical feel of the layout, don't you think?


This is a closeup of the finished cupcake, colored in with Bic Mark-It markers.  The Copic blender pen was used to soften the lines of the two-toned chocolate frosting. As a special touch, the frosting was highlighted with a Sakura Stardust Gelly Roll Pen.


Have you had a chance to use this paper kit yet?  If so, leave your blog page link in the comments below so that we can see your creations!

Come back tomorrow for a special announcement and on Saturday to see a super simple birthday card that was created from the RSVP kit!  

Dec 5, 2013

Throwback Thursday: Generation Z from Little Yellow Bicycle

This week on Throwback Thursday, I'm highlighting two page layouts with paper and embellishments from Little Yellow Bicycle's "Generation Z" collection  While the sketch is similar for each, the difference in the papers and embellishments make them look totally different:


These layouts will be ready when I come across the perfects photos of my teenager!

What collection from the past can you use this week to finish a page layout??


Nov 21, 2013

Throwback Thursday: Yee-Haw with Creative Imaginations!

Lately, I seem to be in a "manic" scrapping mood.  This past week has been the Fall Clean-up of my scraproom (which is also our homeschool room).  I organized many of my patterned papers with matching embellishments (actually putting together kits) so that I would be able to sit down and really get some pages finished.  (Or as some scrappers say, "Kill the Kit!")

(A YouTube video of my craft space will be coming soon!)

Today I am highlighting a couple finished pages that fit in well with "Throwback Thursday".  Both of these layouts use an older collection from Creative Imaginations with a matching sticker sheet.  I found some chipboard and brads from my stash that went well with the "western" theme, in addition to some distressed looking flowers that I made.

This first one is a Halloween photo of my boys from 2006 (they were 9 and 4 years) with special photo effects to make it look a little more vintage.  


This is definitely one of my favorite photos, and this western themed paper was perfect (which is the reason that I purchased it long ago!) 

Next is a Throwback-Throwback Thursday layout!  The photo is actually me in the early 80s, when the western style was so popular!


Because the photo was so small, I kept the area tight with the embellishments and layers so that the photo would stand out. Distressed inks were used on the chipboard butterflies and buckle.  This was the first time I have completed a layout with just one, very small photo and although it was a challenge, I am very pleased at how it turned out.  

(Check out YouTube later this month for a "Layout Share" of some of my favorite "Throwback Thursday" layouts!

There will be another "Throwback Thursday" on December 5th, with something from Little Yellow Bicycle.  Thanks for visiting!  See you next time!

Nov 12, 2013

Scrapbook Process: Soccer Layout with Dapper Dan

For the month of November, my design team challenge for The Memory Nest was to use the new "Dapper Dan" collection from Glitz.  This collection, available from The Memory Nest store, came with 12 patterned papers (two of each style), accent sticker sheet and alpha sticker sheet.  There is also arrowed Washi tape available separately, which I highly recommend (it's versatile enough to use for many other pages!).  Both the paper kit and the Washi are on sale this month at The Memory Nest!

Glitz is unique when it comes to their paper collections - they take current trends and put their own individual twist on them - they often look very different than the other paper debuts during the same season.  It's the same case for their "Dapper Dan" collection.  Glitz grabbed a hold of the mustache trend and added bold geometric patterns and woodgrains for a fun, masculine theme.

The challenge to myself was to take this collection and add my own twist -- to use it for pages that aren't dictated by the paper patterns itself.  For instance, I thought the colors really lended itself well for a soccer-themed, two-page layout:


For these pages, I used a few of my own miscellaneous sport embellishments from my stash (top of the second page).  The "Just Be Cool" card is from "Dapper Dan" that I had already purchased locally. 

Please hop over to visit my YouTube page here for the "Dapper Dan" kit reveal, plus process videos of this month's projects!

Throughout this month I will be posting two additional layouts plus a card made with the kit. The final layout will be completed after this month -- I will be doing a special page dedicated to my hubby's mustache that he is currently growing for the Movember  prostate cancer awareness month!

Thanks for visiting! 

Oct 10, 2013

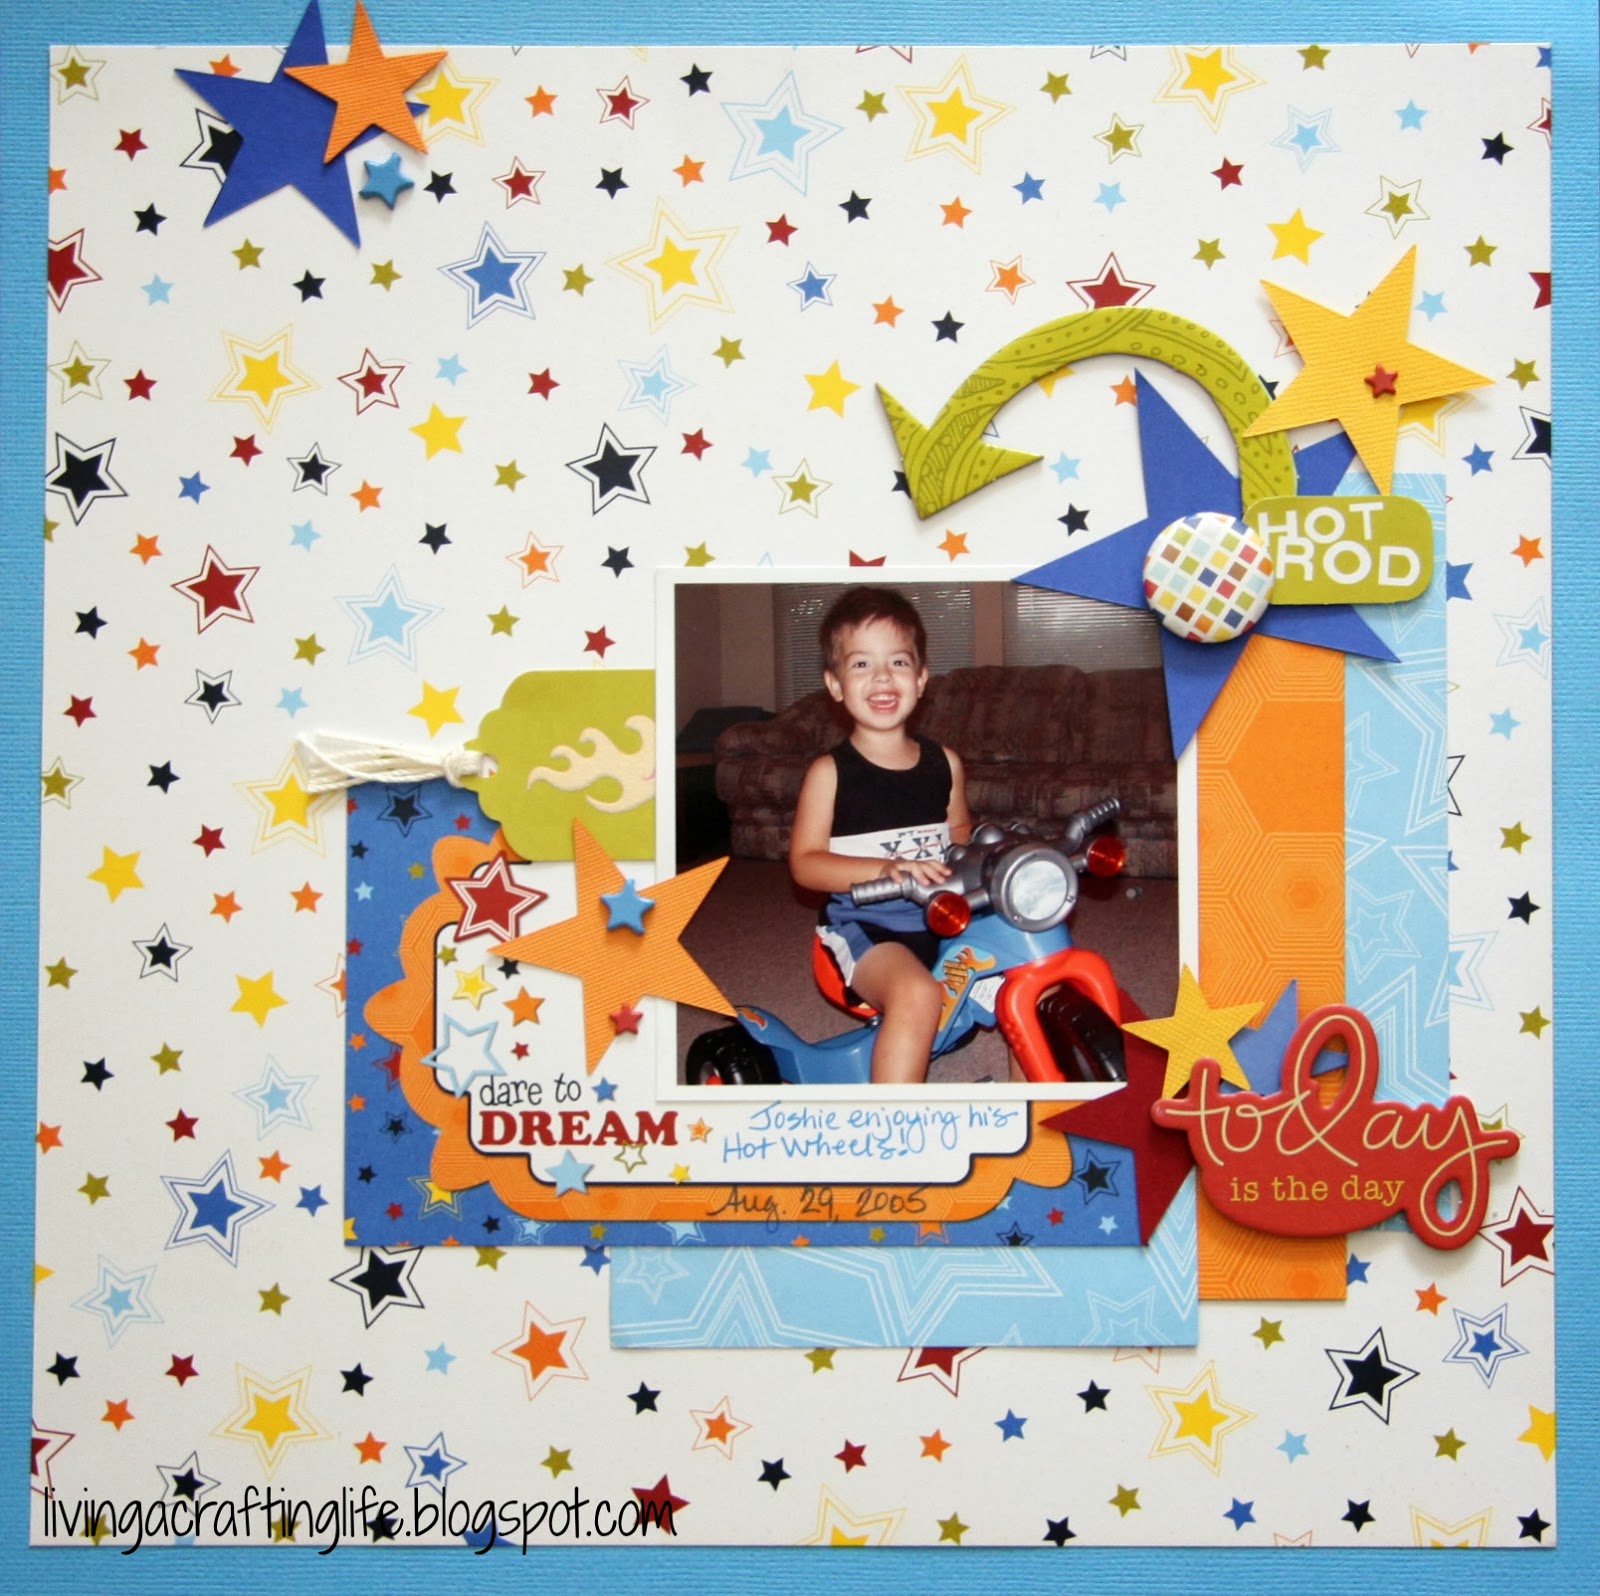
Throwback Thursday: Another "Blast Off" with Bo Bunny!

Last month, I posted a two-part video series, which demonstrated how I designed two differently themed layouts from the Bo Bunny "Blast Off" collection kit.

After completing that project, I still had left over paper and die-cuts, so I was able to finish another page, with another twist:


This was a single, random photo I found of my youngest when he got his first Hot Wheels. (This bike made all the cool motorcycle sounds to go with it too!) The colors, stars and the "Dare to Dream" card seemed to be a perfect fit for this photo.  I printed the photo as a square with a white frame, which was reminiscent to photos from the late 60s, (except black and white) which was when I was Joshua's age and riding my first tricycle.  

What is your Throwback Thursday photo or layout this week?  

Oct 8, 2013

Scrapbook Process and Video: Today it "Feels Like Home"


Today at The Memory Nest blog, Leslie reveals more pages that fellow design team member Kelli (from Use It Scrapbooking) and I completed with the "Feels Like Home" collection by Little Yellow Bicycle.


For this page, I found some older photos of my kids from 2007.  We were visiting Auditorium Shores in downtown Austin, enjoying a beautiful, autumn day.  Yes, it was still warm enough for short sleeves, even in late November! This layout has an obvious triangle -- three groups of embellishment areas -- which is designed to move the eye around the entire page.   Here is a close-up of the embellishment areas:

And if you want to see the process, you can tune in to the video:


The chipboard pieces and stickers are from the "Feels Like Home" collection, the enamel dots from Teresa Collins and the washi tape is Freckled Fawn. (You could probably use this great Glitz "Hello December" washi -- it would be a great substitution.)  You can find these items at The Memory Nest store, in addition to several other new collections!  And here's a special deal . . . . 


Tomorrow I will share a final, BONUS layout from the "Feels Like Home" collection!

Oct 1, 2013

Scrapbook Process: Austin is Home with Little Yellow Bicycle

The new fall collection,"Feels Like Home" from Little Yellow Bicycle, is such a wonderful color scheme and so versatile. This collection is one of the new lines that is now available at The Memory Nest store!  Using this color combination made these fall family photos (taken in October in Texas) really seem homey and cozy (even though we were still in shorts and t-shirts!).


To complete this page layout, I "sorta-kinda" went by this sketch by Becky Fleck, from the August Pagemaps:  


Maybe you can tell that I turned AND flipped the sketch for my page . . plus added banners! With the LYB matching chipboard shapes and cardstock stickers, it made this page come together quickly. (There are also wood shapes available that are really fabulous!)

Here is a closer look at one of my embellishment clusters.  Pop dots were used for the chipboard and flower stickers for dimension, plus enamel dots were added from the Family Stories collection by Teresa Collins, also available at The Memory Nest store!


Now is the time to check out this collection and other new additions at The Memory Nest store where you will get fast and friendly service!

Sep 12, 2013

Scrapbooking Process: Down by the Shore with Fancy Pants

Leslie at The Memory Nest is showing off all the new lines in her store, and I got to play with the new "Down by the Shore" collection by Fancy Pants!  This was the perfect paper to use for some of the many, many photos we took on our family summer vacation to my old hometown of St. Joseph, Michigan on the lake:


I really like how my groups of embellishments from my stash came together with the punch-outs and stickers from the collection!


For this page, I included an interactive element for some of my Instagram photos.  I made photo mats and added 3/4" on the top of the mat to fold and make a hinge.  From there, I lined up and adhered my hinged photo mats to create this cascade.  Journaling is hidden under the last photo.  

Two layouts, two completely different looks from the same collection!  How fun is that?!?!

Now it's your turn -- get those summer photos on layouts using the "Down by the Shore" collection!  The best part?  You can order it now from The Memory Nest store and get 20% off using the code SEPTNEW20, now until the end of the month!  What are you waiting for?  Get your scrap on!

Aug 6, 2013

Scrapbook Process: Bluebonnets and Simplicity

It's time for another summer "Chickadee DT" challenge over at The Memory Nest today!  This is the simplistic layout I created using the sketch and color palette that Leslie chose:


For this layout, I wanted the majority of the attention to go right to the photos, so I chose a light, solid color cardstock for the base, then used two different papers from Pink Paisley "Vintage Vogue" collection (Taffeta and Dress Shop) to bring in the pops of color. (By the way, these papers are on sale now at The Memory Nest store!!

These are two of my favorite photos, and actually, it isn't the first time that I have scrapped them.  This was one of the best years for bluebonnets that I can remember since moving to Texas.  My boys were 8 and 2-1/2 and we did an day trip to Johnson City, TX to the Johnson Ranch to get some great photos that spring.

What is a favorite annual event that you love to take photos of every year?

Jul 3, 2013

Scrapbooking Process: Using Paper With "Built-in" Titles

Happy Summer!  We are really feeling the summer here in Texas, where we had temps over 100 degrees last week.  We could really use some more rain.  Since there is too much on the East Coast -- could you guys over there send us some please?

While in the scrapping mood last week, I found some photos of my oldest son from a few summers ago that had not yet been scrapped.

The only "summery" paper I had at home was a single sheet of paper with a large title already on the bottom of the page.  Although I really don't use this type of printed paper anymore, I thought I'd give it a go.

To help with the layout and incorporate the printed title, I chose a sketch that had a lot of "white space" on the bottom.  This allowed me to scrap on the top of the paper easily.


This layout uses all scraps except for the background paper.  The tags and summer brads are a couple years old that were in my stash.  


The little flags were easy to make:  use corsage pins and washi tape!  


This layout will be added to The Memory Nest Whimsical Wednesday!  When you link up, you will get an entry in Leslie's monthly drawing. Not only that, you can get tons of inspiration from all the other link-ups!

Jun 11, 2013

Scrapbook Process: Smiling with Patterned Paper

Yesterday I talked about my latest project of reorganizing my patterned paper by color.  It has produced good results:  I have found paper that I had forgotten about and now able to use.

This is a layout I finished after my paper reorganization that is for The Memory Nest's sketch challenge that starts linking up today:


The layout started with solid colored cardstock, layered with My Mind's Eye "Lost and Found 3" paper, and  stickers which I believe are from the Indie collection. The photo mat is from Basic Grey's "PB&J" line that I purchased from The Memory Nest store.    

What is a collection you have in your stash that you need to bring out and use?

Jun 4, 2013

Scrapbooking Process Video: 6 x 6 Paper for 12 x 12 Layouts

After organizing all our family's digital photos in one place, you can imagine that I found some real treasures.  The below layout is now one of my new favorites.  My hubby was trying out a new lens back when Josh was three years old, and these are a couple of the photos that came from that little mini photo session.


For this layout, I used three 6 x 6" sheets from an old Sassafrass pad. This pad had so many bold and crazy prints, but I was determined to challenge myself!  I chose a striped pattern and pieced them together on black cardstock, leaving a "hole" for two photos and embellished around them.

The video this week shares some of my tips on how to use 6x6 papers for your full page layouts:


Bonus projects:

With this same paper pad, I finished a card using a Tim Holtz Sizzix die for the card edge and some flower stickers from my stash.  A great card for one of my cool, hippy-type friends:


Finally, a "junk" layout -- using wilder patterns and a variety of miscellaneous diecuts and handmade embellishments from my stash that I wanted to use up.  I suppose you could call this one "eclectic":


I am sharing my creations this week at:
http://thememorynest.blogspot.com/2013/06/whimsical-wednesday-6-share-layouts-and.html

How can you challenge yourself today with 6x6 paper?

May 20, 2013

Scrapbook Process: "Let's Play" a Challenge!

This weekend was fairly productive, scrapping-wise.  I got quite a few layouts finished -- most with old photos that I had never gotten around to scrapping.  Now that I am practicing more and more layering with my 12 x 12" layouts, I find that using one photo on a page is easier than ever before. 


This is a layout finished with some paper from Fancy Pants from a couple years ago that was in my stash and other scraps that I had left over from another layout.  The Page Maps sketch I followed is part of the recent challenge over at The Memory Nest blog that ends tomorrow. 

Leslie also has a Design Team call at her blog too!  If you've ever wanted to try out for a Design Team, this one would be a great opportunity.  Details HERE.  Deadline is May 28th.

What did you scrap or make over the weekend??

Apr 16, 2013

Scrapbook Process: Learning to Trust Your Scrapbook Style

Do you have a certain style, a "go-to" that you seem to repeat in your scrapbook pages?  I do. Even though I try various styles and use different sketches to help me change things up a bit and to expand my art and knowledge of this craft, I tend to lean toward the balanced, classic and clean style of scrapbooking. Maybe it's because of all those years on the yearbook team in high school!  Even when I will follow a sketch, my chosen result, especially if I want to do more journalling, will become a simple style for a two page layout.  Here is what I mean:

This was a sketch for a the current challenge over at The Memory Nest:


And here is the two page layout that came from this sketch:


No mixture of patterned paper or embellishments like on the sketch, but you can see a couple elements that inspired me.  This project was finished with a paper kit that had great paper choices, but no embellishments.  The paper was two-sided, with decorative designs on one side, solid on the other.  From this photo, you can see that I chose two different backgrounds, but mirrored the same dark blue strip on each page, in addition to the red across the bottom that continues to bring the two pages together.

Although these pages are not fancy, and there aren't any embellishments to speak of, I am happy with how this turned out.  These pages are telling a story, so in this case, I don't want extra items to take away from what I want to say.

To make meaningful scrapbook pages, remember: It is definitely okay to use a basic style for your pages. You don't have to be an artist, spend lots of money for embellishments or incorporate all kinds of techniques to get a wonderful result.  Go with what you know and do with what is most comfortable. When my youngest son looks at this layout someday, I want him to enjoy looking at the many photos and reading my memories of that day, and not necessarily  how I incorporated color and style together.

Here are close ups of each page:


So if you feel pressured to finish fancy pages that you see in the magazines or on the blogs, don't.  Take inspiration from it, but it is more important to get it nicely scrapped so that your family will have those memories.

If you want to know more about the sketch challenge I completed, be sure to visit the The Memory Nest's Sketch Challenge.

Apr 10, 2013

Scrapbook Process: Dots and Stripes with Basic Grey

Today's layout is the result of inspiration from two sources.  First, I found a great layout on Pinterest that originally came from pagemaps.com:


Secondly, I wanted to enter a project on today's Whimsical Wednesday post at The Memory Nest blog. I learned of Leslie and The Memory Nest through Twitter; she has a great blog and online store. If you are looking for some challenges, she has a color and a sketch challenge posted right now at her blog.

Yesterday, her blog post showcased layouts by her Design Team using the Basic Grey collection, "Paper Cottage." The layouts were great, and it inspired me to use these sheets of Basic Grey "Bow Ties" that I randomly purchased on my last visit to Archivers:


At the time, I didn't know if I would use this paper for a layout or card.  However, I love Basic Grey, so I got them, and now I'm glad I did, since I was able to do this layout with a couple miscellaneous photos from 2004:  

"Did we catch you in the act?"

I used all three patterned papers, with the reverse of the small dotted paper, which was this blue background.  I used orange Basic Grey letters from the Fact and Fiction collection and punched the hearts out of Fiction paper.  I used Doodlebug twine to make the stitches (albeit, messy stitches) along the side.  It only took me about 30 minutes to complete this layout; I like the simplicity of it, and it's another one for the book.  

If you want to find out more about The Memory Next, her blog is HERE and you can visit her store HERE if you want to check out all the goodies. (And yes, she sells Basic Grey too!) 

Hopefully you can take this sketch and use it to do your own layout today. Let's get some of those photos scrapped!